Showing posts with label marie mayhew. Show all posts

Saturday, December 6, 2025

tutorial on how-to antique ornament caps


cable-knit holiday ornament

clear plastic ornament
Above is a photo of my newest pattern Cable-Knit Holiday Ornaments. A quick and easy holiday gift idea and the ornament is knit up and ready to go within an hour!

I published it yesterday with the promise of a tutorial on how-to antique traditional store-bought ornament tops. NOTE: I sell 20-mm size ornament caps (not the balls) in traditional silver and gold, and fancy silver and gold. They are sold in packs of five tops.

But when you purchase a plastic craft-store ornament ball (2.75-inch size) it already has the 20-mm size cap included. Leave them silver or gold or antique them!

The materials I use to antique are: either a silver or gold cap top, black chalk paint, a brush, either Antique Gold or Spanish Copper Rub'n Buff® and some clear fixative spray (satin finish).

A small bottle of black chalk paint can be purchased at any craft-store, and very little is needed. The chalk paint is opaque enough to cover well in 1-2 coats. 

1. Paint the cap, mainly the outside and loop, making sure to cover all visible surfaces so no gold or silver is showing. Once dry, determine if you need a second coat. If so, do and allow to dry.

2. Once dry, put a very small dab of the Rub'n Buff® onto a piece of paper. A little goes a long way! Using a small dry brush, dip it into the gold paint and lightly brush it across the surface of the ornament top and sides. The dry brushing hits the high spots in the design and accents them and making them pop. You will find that some ornament caps have a lot of detailing and some do not.

3. If desired, do the same thing with the Spanish copper color. The combination of the black, gold and copper creates a rich antique-look. If you needed to choose between the two colors, for sure get the Antique Gold. I love this product and have every color!

4. Once satisfied with the finished results, spray a light coat of clear fixative over the cap's top and sides. The fixative protects the finish and prevents chipping. Allow the ornament cap to air dry completely. Once dry, it is ready to insert into your ornament. 

This is the simplest and most desired method I have found to create this look. It takes your ornaments to the next level or sophistication!

The ornament cap hanger in the photo at the very top is actually from a larger size ball ornament (5-inch), the next size up from the one I usually use in my patterns. I found I liked the look of a larger-size cap on my smaller ball ornaments especially with this bulky sweater-like look. Its personal preference. Don't hesitate to go by the ornaments just for their cap size because right now especially they can sell them for $0.50 depending on where you go. 

NOTE: An antiqued ornament cap hanger would look whimsical on the Buffalo-Plaid Holiday Ornaments pattern, or how about the Holly-Dazzle Ornament Pincushion? And don't forget the Woolly Holiday Ornaments pattern! I'd love to see what you do with this technique!

Happy knitting!


Friday, December 5, 2025

NEW! cable-knit holiday ornaments


cable-knit holiday ornament

This is my last pattern published in 2025! I have two more I am working on but will have to wait til next year. Today I am introducing my newest pattern, Cable-Knit Holiday Ornaments! This holiday season create a tree full of sweater-like ornaments.

The pattern gives instructions for 3 cable-knit designs. Each knit ornament measures about 2.5-inch / 6.35 cm wide by 3-inch / 7.6 cm high (including the metal cap). 

buffalo plaid ornament
buffalo-plaid holiday ornament
The ornament is knit as one continuous piece. No sewing of seams is necessary. Knitting begins at the bottom and moves up towards the top. A clear plastic craft-store ornament is inserted into the knitted piece and the final stitches are synched tight around the ornament's plastic neck. The crowning touch is the metal wire cap hanger.

I love this pattern and actually started creating it in 2023, the same year as the Buffalo-Plaid Holiday Ornaments pattern was published. They were and are meant to go together, but life obviously got busy. 

I have a new tutorial on how to transform a simple silver or gold ornament cap into an antique-like one. You can find it HERE. Its a fun addition to all my holiday ornament patterns, even the felted ones!


So, if you are looking for a quick and easy holiday gift for that special someone or need a unique hostess gift, check out my newest pattern. You can knit up an ornament in less than an hour. Add a decorative ribbon to the cap and you're good to go.

Happy holidays to you and your family! Wishing you a blessed New Year!

Happy knitting!


Monday, February 10, 2025

NEW! out-like-a-lamb pincushion


out-like-a-lamb pincushion

My newest pattern recently published, 'Out-Like-A-Lamb' Pincushion. Now available online!

As the old saying goes, "March comes in like a Lion and goes out like a Lamb" describes the transition between winter and spring. To help celebrate the anticipation of spring, knit and felt the March pincushion, a lamb, and transform it with a layer of loopy-locks -- a quick and easy embellishing technique. This little lamb makes a great gift for the quilting or sewing enthusiast in your life!

The felted lamb measures about 3-in / 7.6 cm tall from its base to the top of its back. The pattern begins at the base and works upwards to the top. The lamb is knit as one continuous piece, no sewing. The lamb's head stitches are then picked up and knit.
all-white lamb

Once felted, the lamb's body is embellished with loopy-locks: small loops created using a continuous strand of bulky weight yarn then needle felted to the body. The face is embellished using simple embroider and, if desired, decorative pins are the final accent to your finished lamb pincushion!

The little lamb is the seventh pattern in my pincushion-of-the-month collection. Be sure to check out my other designs, more to come! And let me know what you think!

Happy knitting!


Monday, April 10, 2023

Kathy's bunnies!


lil' bunny kisses

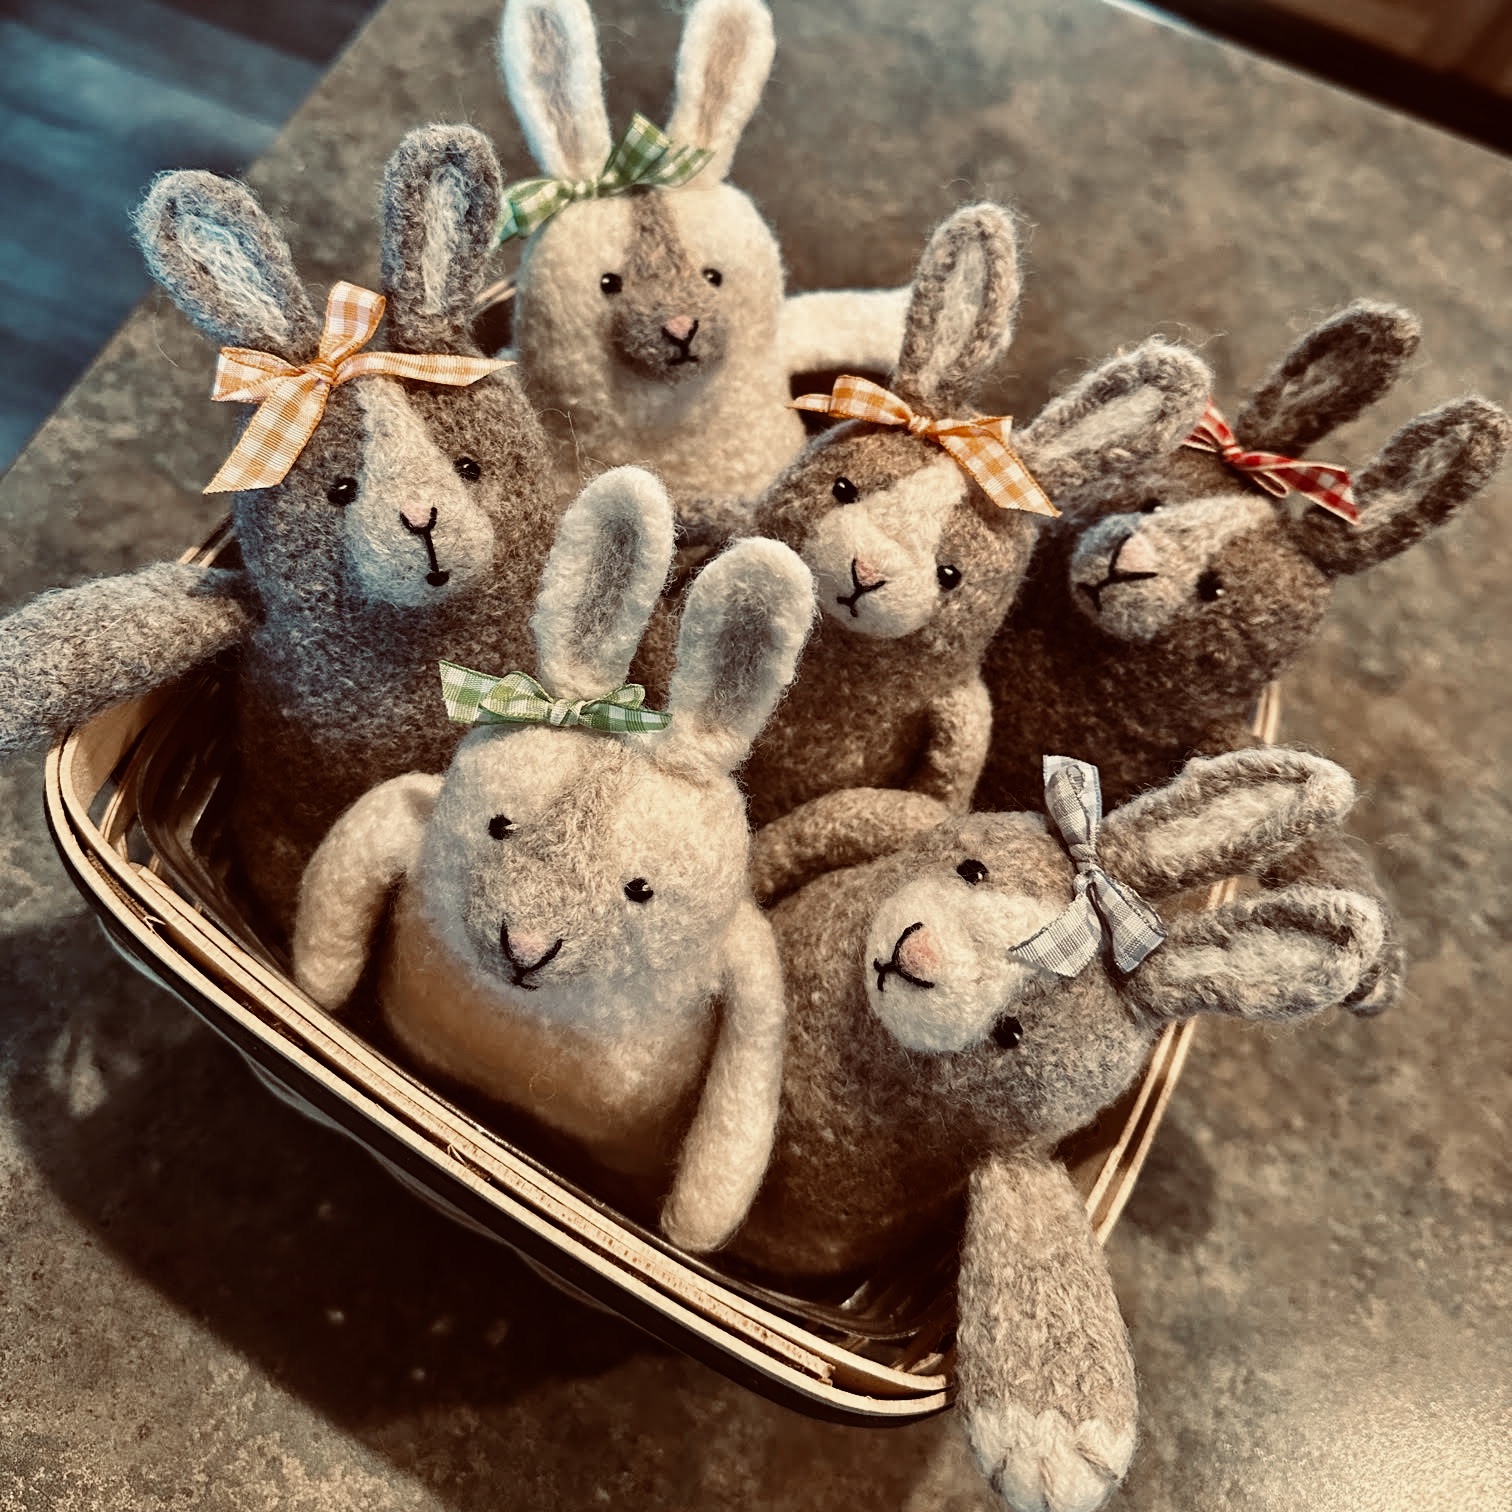
I received a wonderful Easter gift this past weekend, an email from a longtime pattern customer. She wanted to share her bunnies with me (above), using my pattern Lil' Bunny Kisses. She has been busy, creating bunnies for her nieces and nephews. And she used scraps and stash yarn to boot. How cute are they?

I love the two-tone paws in the bunny in the front! Kathy said she was running out of yarn and had to improvise. What a fun idea and I am planning on doing the same. I think that if you do a two-tone paw you don't need the round disk on the paw's other side --- a great alternative. 


She told me she had embroidered yarn eyes on each of the bunnies because of the age of the recipients, but glass eyes, size 5 mm, are another alternative. Please keep your child's age in mind when choosing the eyes to prevent unnecessary swollowing.

Her photo has inspired me to create a bunny or two myself! How about you?

Thanks for sharing, Kathy, and giving permission to share your photo of bunnies! Any others have photos to share? If so, send them to mariemayhewdesigns@gmail.com

Happy Easter!


Monday, December 28, 2020

merry christmas!

From my house to yours!

 Merry Christmas &

a Happy (Better) New Year!

I don't know about you, but its been a good but challenging year this 2020. I am ready to move on though, to something not so pandemic, I think. I just wanted to take a moment and wish all of you a blessed Christmas season and hoping your holiday is cozy and full of knitting and movies!

I have many new pattern ideas in store: more Woodland Pals critters and clothes, 6 more pincushion ideas to finish off a whole year of them, knit-only patterns for snowmen and snowbaby and possibly a new ornament idea and knit-only pumpkin. Seems like enough for one year. Don't want to put too much pressure on myself, cause sometimes just letting the creative juices flow is also just as fun.

In addition, watch my website (mariemayhew.com) for Zoom classes on needle felting and even some of my patterns, like the Woolly Snowman. Live classes, taught in the comfort of your own home! Let me know what you would like to learn. I can do personal classes too with only a few of your favorite friends.

Thank you always for your wonderful support and encouragement with my creativity and patterns. You have made my job very fun and playful.


Happy knitting!


Friday, August 28, 2020


marie mayhew designs

free booklet shipping

Right now through my Etsy Shoppe, I am offering FREE shipping on my 'booklet' patterns. That's right, on my booklet patterns only. I sell PDF downloads too, but they are already free shipping (wink-wink). A great time to get caught up on those patterns you have been thinking about.

I also have a snowman pattern deal: Buy three patterns (Woolly Snowman, Woolly Snowman Hats, and Woolly Snowman Accessories) for $30.00 and get either the Woolly Snowbaby pattern or the Woolly Snowman Materials Kit (both an $8.00 value) for FREE. Your choice!

When out and about, customers will ask me, "Why don't you publish your newest patterns in booklet form anymore? I love those booklets!" Personally, I do too. Originally when I started designing I sold mainly to yarn stores across the country. Now every store is reducing their pattern inventory and going with the PDF patterns, which obviously take up less space in their store. In addition with today's society wanting everything NOW, the PDF format is that perfect solution. Thus, I still have inventory on my booklet patterns. Maybe someday we will slow down and revert back, who knows!

In defense of the PDF patterns though, per pattern you get more photos, in fact color photos especially. This format allows for that. Where as the booklet format you only had the cover photo, and there was a lot of pressure to make it a good one! 

For those of you who don't have access to a home printer, and are unable to download and print out your patterns, I have two suggestions for you: Contact either a knitting store in your area and they would gladly do it for you OR contact me. I would gladly mail out a printed copy of the PDF pattern for a small mailing charge.

Hope you take advantage of the special. Get 'em while they last!

Happy knitting!


Thursday, July 16, 2020

NEW! lil' bear hugs pattern


little bear hugs knitting pattern cover

lil' bear hugs PDF pattern

During these times of social distancing, Zoom meetings and a whole lot of virtual everything, what's most needed right about now is a good bear hug! Everyone we know could use a good bear hug.

And to help bring some sweetness to those we may be missing more than ever, I have created my new little comfort bear: Lil' Bear Hugs. It is my newest knit and felt pattern. In designing this bear, I turned to the process of felting because of the great texture of felted wool, and I wanted the little bear to be sturdy for continual hug ability over time. The felted bear measures about 7.5-inch/19-cm tall, not including the ears.

The pattern uses worsted weight yarn in two colors: the body color (76 yd/69.5-m) and the muzzle color (3 yd/2.74-m). The needle size is 10.5/6.5-mm double points. The bear's body is knit as one continuous piece. No sewing required! The pattern begins with knitting each leg separately then continuing up the body towards the head. The bear's muzzle, ears, arms and tail are each individually picked up and knit onto the body. Once felted, the face and paws are embellished using simple embroidery and needle felting. A hand-stitched ruffled-collar is created using a length of decorative ribbon.
close up of little bear hugs bear

bear with 5-mm glass eyes

The bear's paws consists of two parts: the yarn-paw lines and a craft-felt heart. The little heart is needle felted to the paw's underside. It is a perfect way to add a little extra loving to each bear hug! The bear eyes can be either glass or yarn. Because of the danger of swallowing, do not use glass eyes for bears of younger children. 

NOTE: For those interested in the glass eyes, they are 5-mm black glass eyes on wire pins and I sell them in sets in my Etsy store. 

Although, no one ever tires of a traditional brown-colored bear; its fun to play with a variety of yarn colors for each bear. Yarns with alpaca or mohair in them create fuzzy felted bears especially after being brushed with a nap riser brush.

My goal for early Autumn is to create a felted rabbit about the same size as the bear. Once published, I will begin designing clothes and accessories for both the rabbit and bear that will be interchangeable. 

For this pattern's recipe, I have included my most favorite blueberry muffin recipe. I have been playing with this recipe for some time and am happy with the final result. Hope you will too!

Once your little bear is finished, it is ready for gift giving! Box it up and mail him/her off to the next person on your list of special loved ones. What a surprise to receive a box of sweet bear hugs in the mail! Hugs to you!

Happy knitting!


Friday, February 14, 2020

candy corn endearments!

'sweet' deal today!
Happy Valentine's Day!
Wishing you a sweet one, full of knitting and maybe a chocolate or two!

Today I have a Valentine special for you: buy two of my PDF patterns and get a Valentine PDF pattern of your choice for FREE. My Valentine patterns include: Owl-Be-Yours!, Woolly Candy Corn, and Woolly Sweet-Hearts. The special runs through today, February 14, midnight Central Time.

In order to receive the special deal, order two PDF patterns either on my website, Etsy or Ravelry. In addition, send me a note with your pattern request. I will email the pattern file to you.

Wishing you a sweet one!

Happy knitting!

Friday, September 20, 2019

pumpkin pillow two!

two sizes of pillow-toss pumpkins
Pumpkin season has arrived, sooner than later this year! Cooler weather, shorter days.

After publishing the Pillow-Toss Pumpkin pattern, I continued playing and came up with a smaller version of the pillow. The smaller pillow measures about 9.5-inches across (the bigger pumpkin pattern measures about 12-inches). With a few edits to the pattern (see link to download below), you too can create a smaller pumpkin pillow!

12-inch pillow-toss pumpkin
Small-Size Pumpkin Instructions:
Knit the pumpkin the same as the original pattern, Pillow-Toss Pumpkin, up to the completion of Round 15 (78 its). Stop after this round. Jump then to Rounds 20-39 and knit the following pattern: *k13, p1*; repeat *to* to the end for 20 rounds.

NOTE: Change to size 11 dps at any time for ease of knitting. Place a stitch pin marker at this point to indicate the BOR.

Once the 20 rounds are complete, jump to Round 44, and begin the decrease rounds. Knit the rest of the pattern as per the original instructions. Assemble the smaller pumpkin pillow the same as the larger one, but use 2 to 3 total yards of Color B yarn for creating the furrow lines (instead of the original 4 yards).


For the smaller pillow-toss pumpkins, I don't attach
a knit leaf or curly vine. Just keep the smaller pillow simple and sweet. The combination of two pillow sizes makes a beautiful autumnal display!

Pillow-Toss Pumpkin Addendum download


Happy knitting!


Sunday, September 8, 2019

'k1b' pumpkin tutorial

cable-knit pumpkin
HELP ME, please? Are you having troubles figuring out the 'k1b' in my newest pumpkin patterns (pumpkin patch, cable-knit or tartan-plaid)? Well, you are not alone. I am finding out that 'k1b' can mean a lot of different things out on the web. This tutorial will put your searching to rest so you can finish that pumpkin with a smile still on your face!

The reason I chose a 'k1b' is because it is near-invisible increase and doesn't leave a hole. Holes are not good when stuffing with fiberfill. I am used to dealing with felted wool where everything evens out in the wash. I am having to learn new stitches to get the final results I want in my patterns, thus the 'k1b'. So here is a quick tutorial.

To create a 'k1b', first insert your right needle into the back of the stitch below the next stitch on the left needle. Insert the needle into the stitch and lift that stitch up onto the left needle, then knit it. Those two moves (lifting and knitting) is the 'k1b'.

Now, the original stitch (the stitch on the needle above) is still there to be knit, BUT it is NOT part of the 'k1b' sequence.

So for instance, in my cable-knit pattern on Round 4 it says to *k1, k1b, k1*; repeat *to* to end of round (36 its):

You knit one stitch (k1), lift and knit into the stitch below (k1b), knit one stitch (k1). That is the pattern. For every two stitches on the needle, you are increasing one more with the 'k1b'. Repeat this sequence throughout the round and you will have increased 12 stitches for Round 4.

Hope that makes sense. If not, email me and I can help you further. I am here to help. My patterns are meant to be enjoyable, producing enjoyable results. So, if you are not enjoying it, give me a holler.

mariemayhewdesigns@gmail.com


Happy knitting!

Sunday, March 17, 2019

my woolly somethings

woolly chick with wire legs

I'm cleaning house, business-wise! That is, I'm sorting through my hundreds of samples and needing to pare down some!

I opened a second Etsy Shoppe to sell these 'extra' samples. My shoppe is called My Woolly Somethings.  I have made changes to many of them, as you may notice, making them truly one-of-a-kind. They are all knit and felted and ready to ship. No waiting required!

Hope you check out my shoppe! I am running a sale that if you buy two or more samples you will  get FREE shipping within the domestic United States.

A great gift for that special friend or family member to add to their Easter baskets.

Hope you find something you like.

Happy knitting!

Thursday, February 14, 2019

a crochet-edge heart

woolly sweet-hearts pattern*
Happy Valentine's Day!

Here in Minnesota a little sweetness is most needed amidst all this snow and polar temps this February 2019. Hope your day is a sweet wherever you are!

In honor of Hearts Day, what better way to celebrate but with a third and final heart embellishing tutorial: how to create a crochet edge on a heart knit and felted from my Woolly Sweet-Hearts pattern.

Materials needed for this design are fingering weight yarn in matching or coordinating color to the heart, a size C crochet hook, and a chenille needle.

The heart in the above photo is a large traditional-style design. It was first knit with worsted weight yarn and then felted.
blanket stitched heart

The shell edge is done all around the center of the heart, dividing it in half (cream heart photo). Using the fingering weight yarn, (the same yarn you will crochet with), embroider the 'blanket stitch' all around the heart. If you do the stitch in a contrasting color like I did with this cream heart, it can be left like this (no crochet edge) as a fun design in and of itself. It creates like a cord look around the heart.

Once the blanket stitch is stitched, start at the top of the heart, left-side, and move counter-clockwise. Begin crocheting a simple shell edge as follows: *dc, dc, sc, dc, dc all in one blanket stitch, sl st into the following blanket stitch, then in the next blanket stitch begin again*; repeat * to * until the end.

Stay loose and not tight. If too tight the shell edge will curl up. If this happens once completed, wet with water the crochet edge. Tug the edge slightly to even it out and allow it to air dry like this.

So whether you add a crocheted shell edge to your heart or not, here are two new embellishing designs to play and practice with.

Don't hesitate to ask if you have further questions. I am here to help.

Happy knitting!


*NOTE: The pins in the top photo are from Just Another Button Company, Will you BEE mine, Valentine? just pins set.

Wednesday, February 13, 2019

a curly-cue heart

woolly sweet-hearts pattern
Today's heart tutorial is one I call my curly-cue heart, for obvious reasons. I love this design! It is so easy to do but it looks so complicated. It is sure to get rave reviews with your family and friends.

The pink heart is the large folk-style design from my Woolly Sweet-Hearts pattern. Again, like with yesterday's heart, I only embellished the top side.

Materials needed for this design: an all-purpose (38-gauge) felting needle, fingering or sport weight yarn in a coordinating color to the heart, FireLine bead thread, fine beading needle and tiny seed beads (size 11 used in photo).

To begin the curly-cues, I cut several 4-inch lengths of yarn (fingering weight in photo). Fingering weight creates finer lines, and sport weight, slightly thicker. I took one length and created a small curl near the bottom of the heart. Then I used the felting needle and began poking the strand down atop the heart. I poked it lightly to slightly adhere it to the heart, holding the curl in position. I like to first baste all the curls down just in case I need to move one later if needed. Take another length and butt it up next to the first curl and form a second curl. Baste it into position.

Continue in this manner until the heart is covered in curls. I like to alternate the curls having a left facing curl butt up against right facing and so forth.

Once all the curls are in position, then I begin going over each of the curls again and again to permanently adhere them to the heart. As you continue to poke the yarn it will flatten and first seem like its getting wider. The more you poke the thinner it becomes, looking more like its original old self.

At the end of most of the curls, I added a little ball of pink, giving the curl further dimension. To create this look, cut a 1-inch length of pink yarn and pull the plies apart. Smoosh them between your fingers, creating a little bit of yarn fluff. Roll this fluff into a tiny ball and needle felt it down onto the curl's end, poking it into a round dot and then flattening it.

The final touch is the beads. I used size 11 seed beads in a pale pink color. I used FireLine clear beading thread because of its transparency. You can bead a top any color heart and it won't show. I sewed the beads randomly around the heart adding further texture and sparkle. I cut a length of bead thread long enough to sew on all the beads with one thread. The hardest part about beading is threading that darn needle, so work efficiently and use only one thread. For more detailed instructions on how to bead atop wool review my book, Whimsical Woollies or my Woolly Eggs or Woolly Holiday Ornaments patterns.

There you have it! Another fun and one-of-a-kind heart for your bowl of sweet hearts.

Don't hesitate to ask if you have any further questions. I appreciate the feedback.

Tune in tomorrow for my final tutorial, a crocheted-edge heart.

Happy knitting!


Saturday, February 2, 2019

NEW! woolly sweet-hearts

woolly sweet-hearts
My newest pattern, Woolly Sweet-Hearts, was published today, just in time for Valentine's Day! But with this pattern,  now everyday is a perfect sweet-hearts day.

every day is sweet-hearts day
Woolly Sweet-Hearts is a knit & felt design. The pattern gives instructions for a Traditional and Folk-style heart in two sizes: small and large.

The Traditional heart shape is more round and the Folk heart is taller, both in body and in the height of its bumps (the two rounded tops of the heart).

The hearts are knit using worsted weight yarn and size 10.5 double point needles. This creates a finished small heart about 2.5-inches wide by 3-inches high, and a large heart about 3.25-inches wide by 4-inches hight. Sizes do vary for each heart style design.

red, white, pink hearts
The hearts in the background, photo above, were knit using sport weight yarn and size 8 double points. Fill a bowl of hearts in several sizes, styles and colors!

In addition, the pattern gives instructions for two embellishing designs: Bee Mine and XXO. Once the hearts are felted, adding a button and simple embroidery turns them into messages of sweet endearment.

Legend says a red heart symbolizes love and passion; a white heart, true love and purity of mind; and a pink one, sweet friendship. Knit a heart in every color to show your true colors!

Happy knitting!

Wednesday, December 6, 2017

corks & pins for trees

woolly pine trees
The Woolly Pine Trees pattern is now available in either PDF or booklet format. I am so pleased to have published it in time for the holidays. They make great hostess or even secret Santa gifts!

set of 5 wine corks
In addition to the pattern, I also have in-stock for finishing off your little pine trees: wine corks and individual holiday pins. The wine corks are ready-to-go, the perfect size for your tree trunk. Each cork measures about 1 3/4-inches long by 7/8-inch in diameter. Ready to glue and insert into your felted tree. Don't want a wine cork? Just head outdoors and cut yourself a tree branch as a wonderful, natural-looking alternative.

holiday pins
The holiday pins shown are the crowning touch for your little pine tree. The pins are from Just Another Button Company. They are sold individually (you choose the design styles) and as a set of 5 pins (some all the same design and variety packs). Lots of whimsical choices to choose from!

Happy knitting!


Tuesday, October 31, 2017

happy halloween!


tartan-plaid pumpkin pattern
Wishing you a spooky all-Hallow's eve! Don't eat too much candy tonight . . . just enough to satisfy that sweet tooth.

Never too late to knit another pumpkin or two. Maybe you missed the Halloween-pumpkin-knitting-round, but now you're just in time for Thanksgiving.

Happy knitting!


NOTE: The pattern is Tartan-Plaid Pumpkin, the pins are Just Pins Halloween BOO collection, and the ghost is hand-made using white oven-bake clay and a sharp-end toothpick. I drew the face on it using a black felt pen.


Saturday, November 19, 2016

NEW! needle felting kits

woodland baby owl ornament kit
Another new pattern available in my Etsy shoppe! I'm turning several of my knit & felt patterns into needle felting kits. Right now I have two available for sale: woodland owl and woolly pumpkin.

Each kit comes with all the materials needed to make one of these little sculptures. A great kit to learn the art of needle felting. If you are familiar with my patterns, you know I like using needle felting for  embellishing. But needle felting little 3-D creatures, like the owl above, adds a whole new level of creativity and fun to the art of needle felting! It is simple, quick and very similar to playing with play dough, but this time you use a sharp-barbed needle instead of your fingers.

woolly pumpkin ornament kit
FYI, my needle felting kits do NOT include foam pads. Why? While talking with my customers and gathering their feedback, several told me they had at least one foam pad already. They simply wanted the raw materials, another felting needle (cause they can break) and the detailed instructions to get them started. But for those of you just starting out, I do sell small high-density foam pads.

Check back with me and visit my Etsy shoppe as I add new patterns and kits this holiday season. My creative juices are flowing again, and I am excited to share them with you all. Enjoy!

Happy knitting!